Marketo just got smarter. Discover three ways to make the most of the new Executable Campaigns feature and streamline your marketing automation workflows.
But first, what are Executable Campaigns? Anyone who has worked with Marketo knows how great it is to set up Operational Programs that will help you with Data Management, Lead Scoring, Interesting Moments, etc. Executable Campaigns enable you to do this smarter and even more efficiently.
Imagine you want to set up an Interesting Moment for a form fill out. Up to now, you’ve had to rely on tokens such as program name {{system.program name}} to set up a standardized flow for Interesting Moments within your Operational Program.
Or if you need to run through data normalization by adding country code to a lead before syncing with your CRM, you would have a Smart Campaign run through that normalization on lead creation. And to ensure you do not sync before the data is added to the lead, you add a wait step of a couple of minutes.
With Executable Campaigns, you can request the campaign, let it run through – using tokens from the Parent Program, and when it’s done, continue with the rest of your flow steps.
So, how do you set up an Executable Campaign?
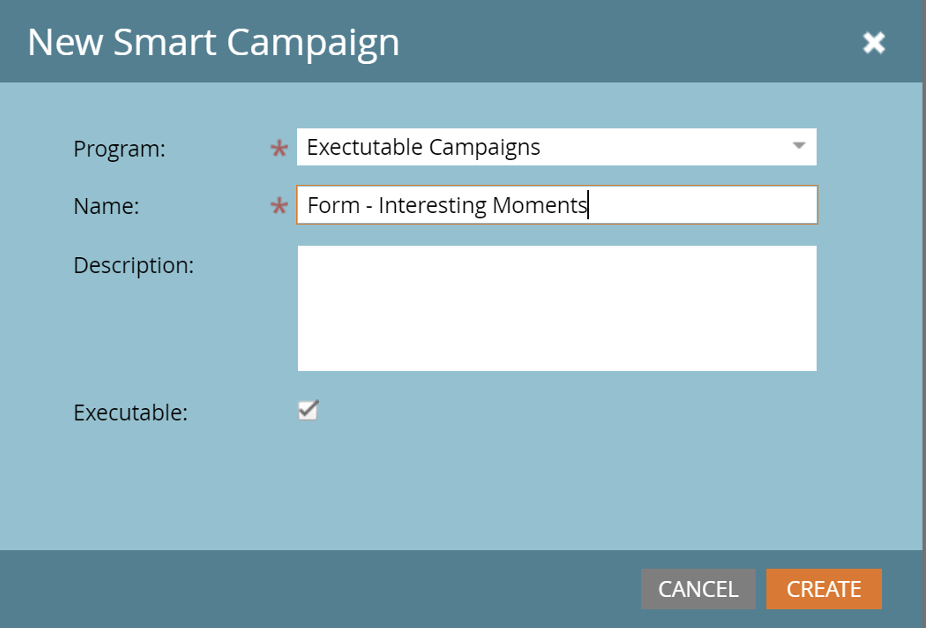
1. Use Executable Campaigns to leverage local tokens from an Operational Program
You need to create an Executable Campaign. This is as easy as setting up a standard Smart Campaign.
One note here is that all triggers are disabled in Executable Campaigns – as it will only be executed from other Smart Campaigns. Start with setting up any filters you may want to use.
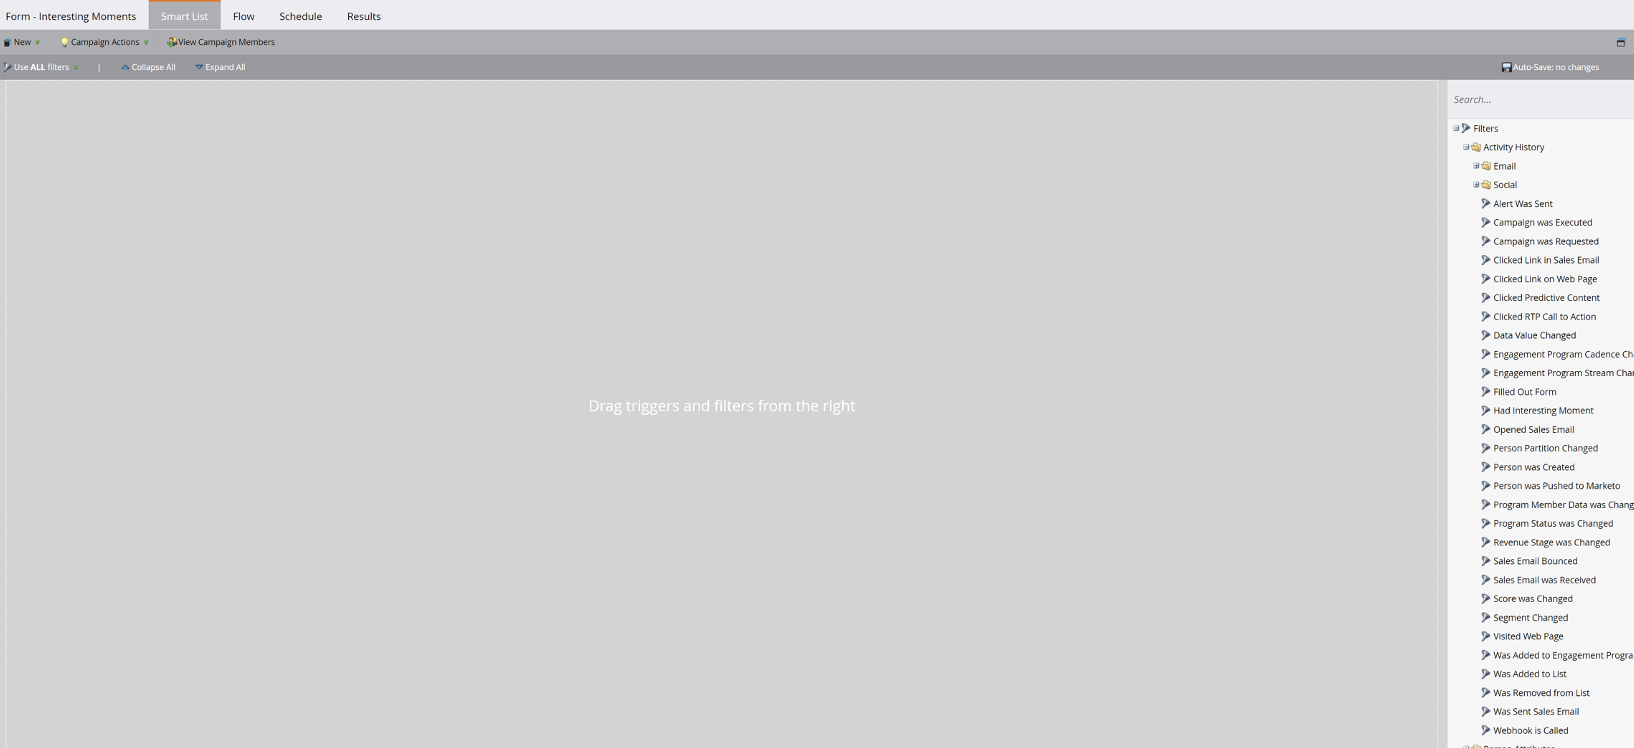
In the flow step, you can use local tokens from other programs. This is a great feature as Marketo will check for you if the tokens exist (not only in the Operational Program, but anywhere in the Workspace).


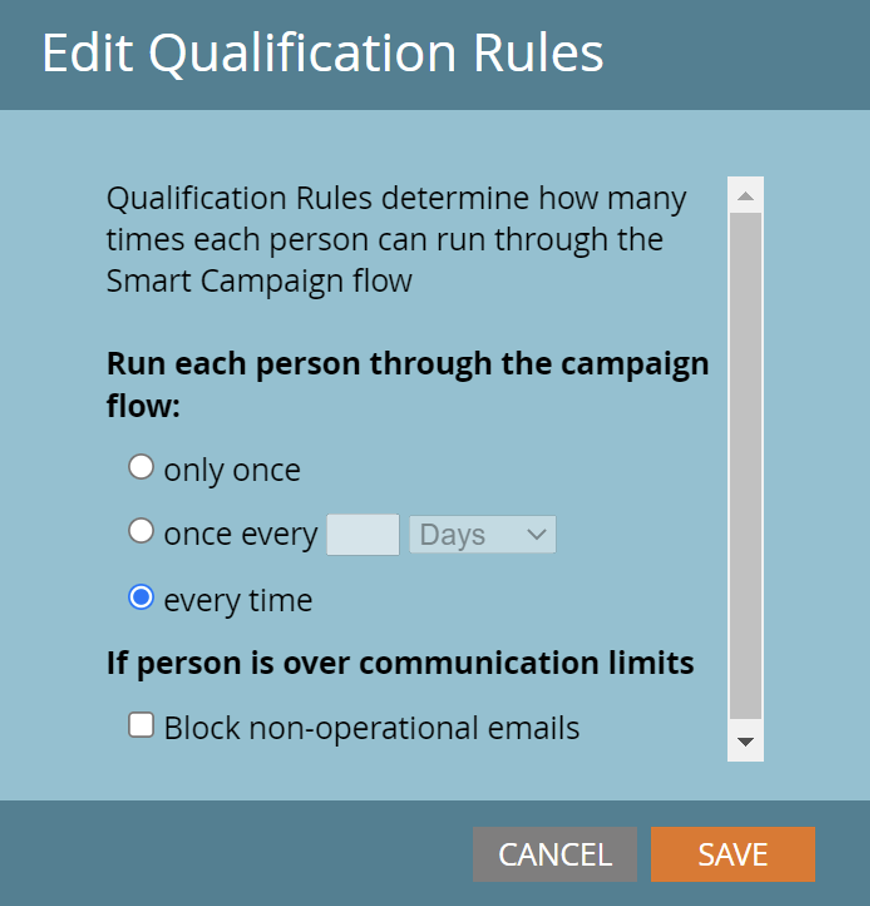
As this is an Executable Campaign, there is no need to activate the campaign – this is another difference compared to a requested campaign.

But as always, consider how often a person should be able to go through the campaign. In many cases for Executable Campaigns, it will be every time.
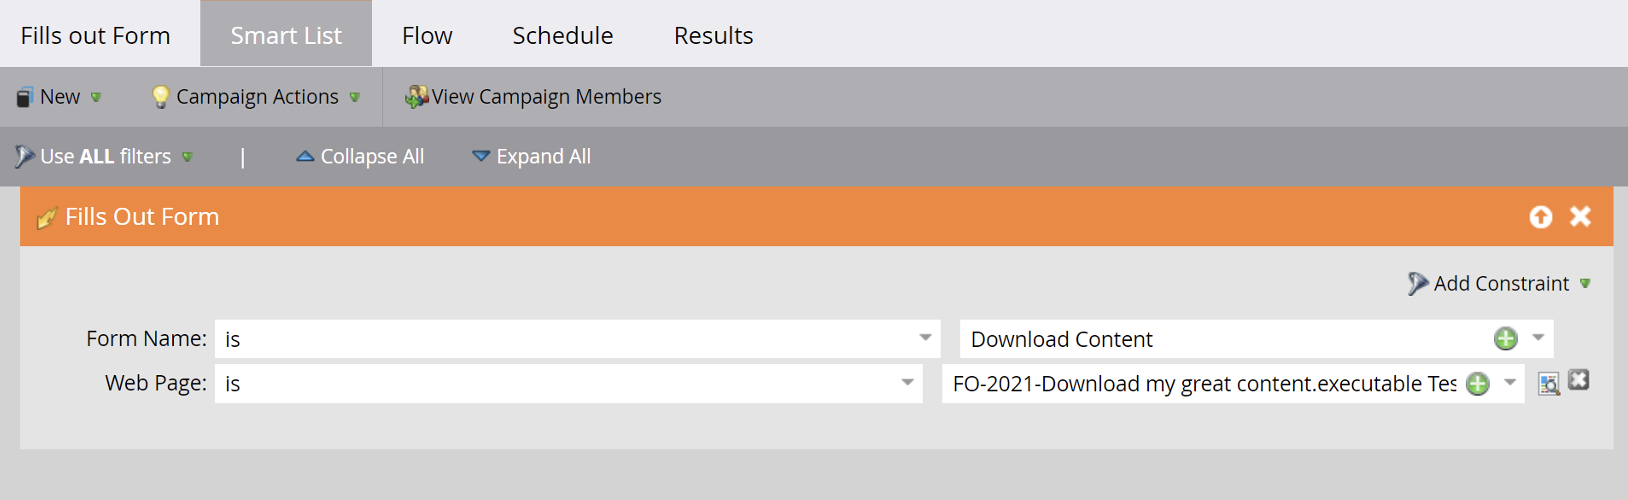
Now, let’s run through an example case where we’ll explore how to leverage the Executable Campaign in the Form Program used to send a content piece.
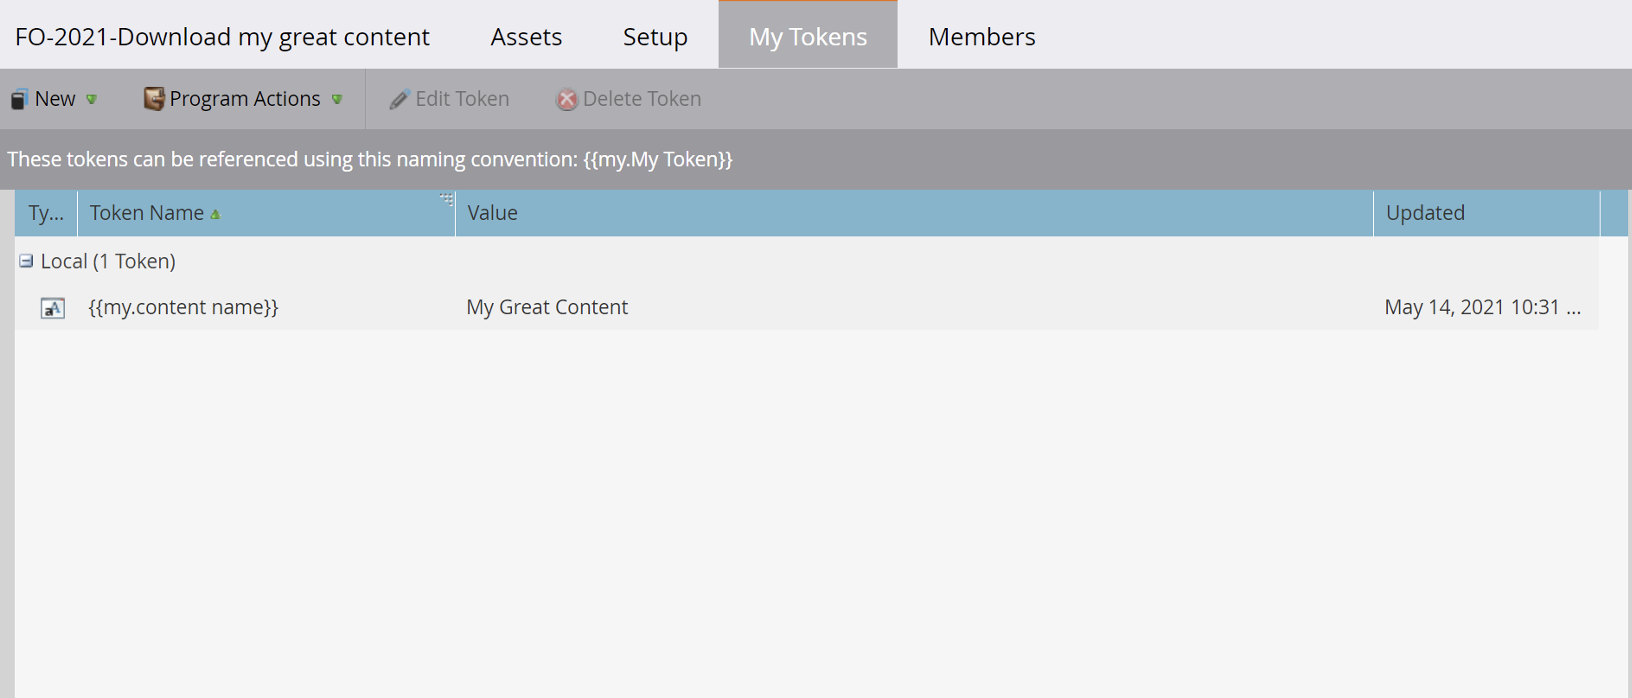
First, to validate I am using the token {{my.contentname}} in the program that hosts the landing page. I am also using a Global Form, and only hosting the landing page and the Smart Campaign within the Program.
For the Smart Campaign, I use a standard triggered campaign, and as I use the Global Form, I also add my landing page (which is the Executable Test).
Now, for the flow step:
Under “Special” we have a new Icon: Execute Campaign:
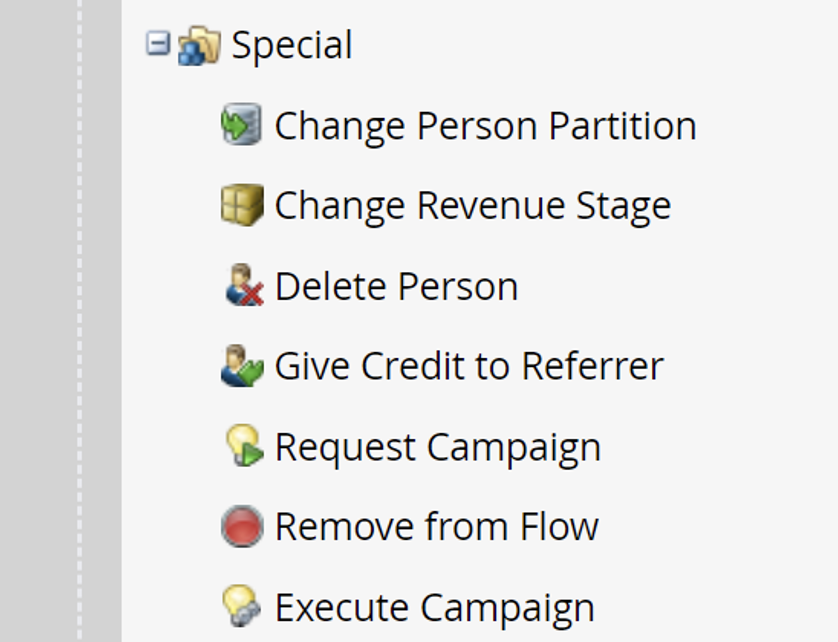
In classic Marketo style, you can search or choose the existing Executable Campaigns.

Here you have a new choice available: “Use Parent Campaign Token Context,” which in this context should be changed to true. The Parent Campaign is this Smart Campaign that we are editing now, and if false is selected, it will pick up any tokens available in the Operational Program where the Executable Campaign exists. When complete, it should look similar to this:
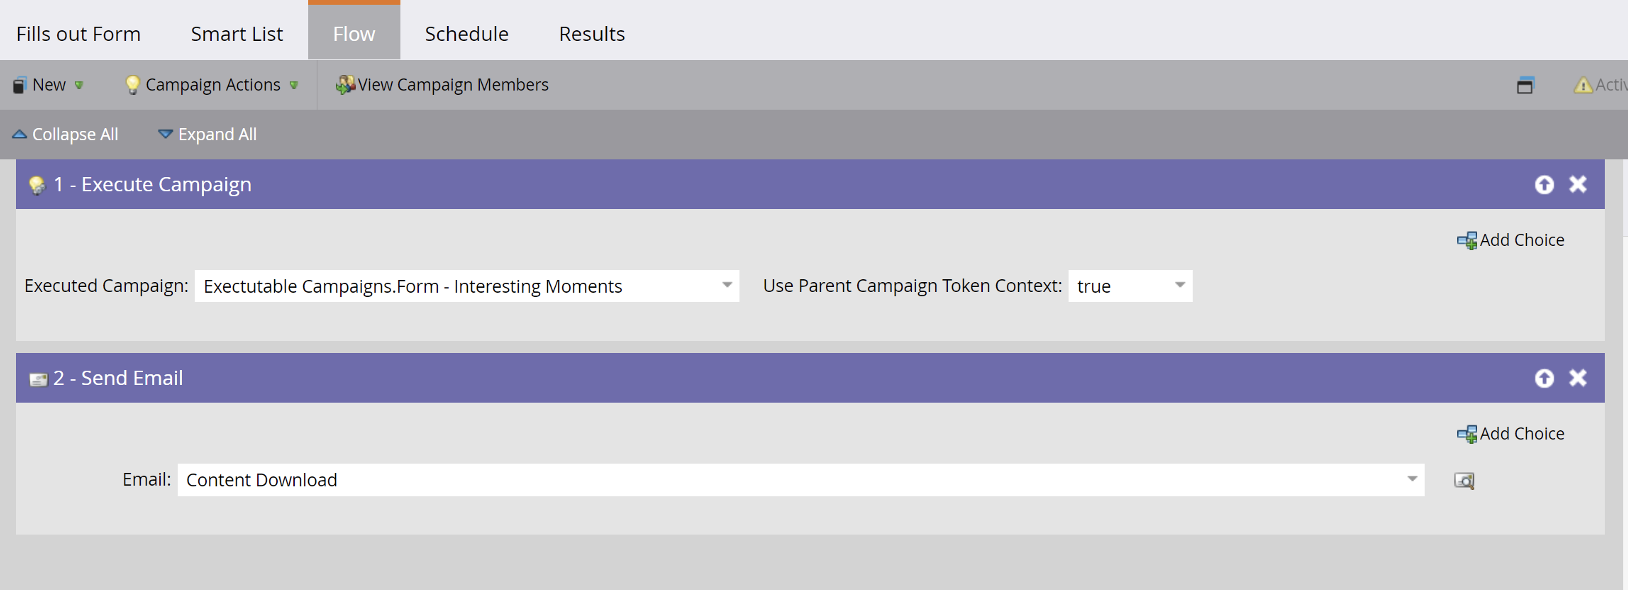
Next, activate as usual, and once you are done, you will have an Interesting Moment triggered from an Operational Program that uses local tokens. The result will look like this in the Activity Log:

2. Use Executable Campaigns to normalize data
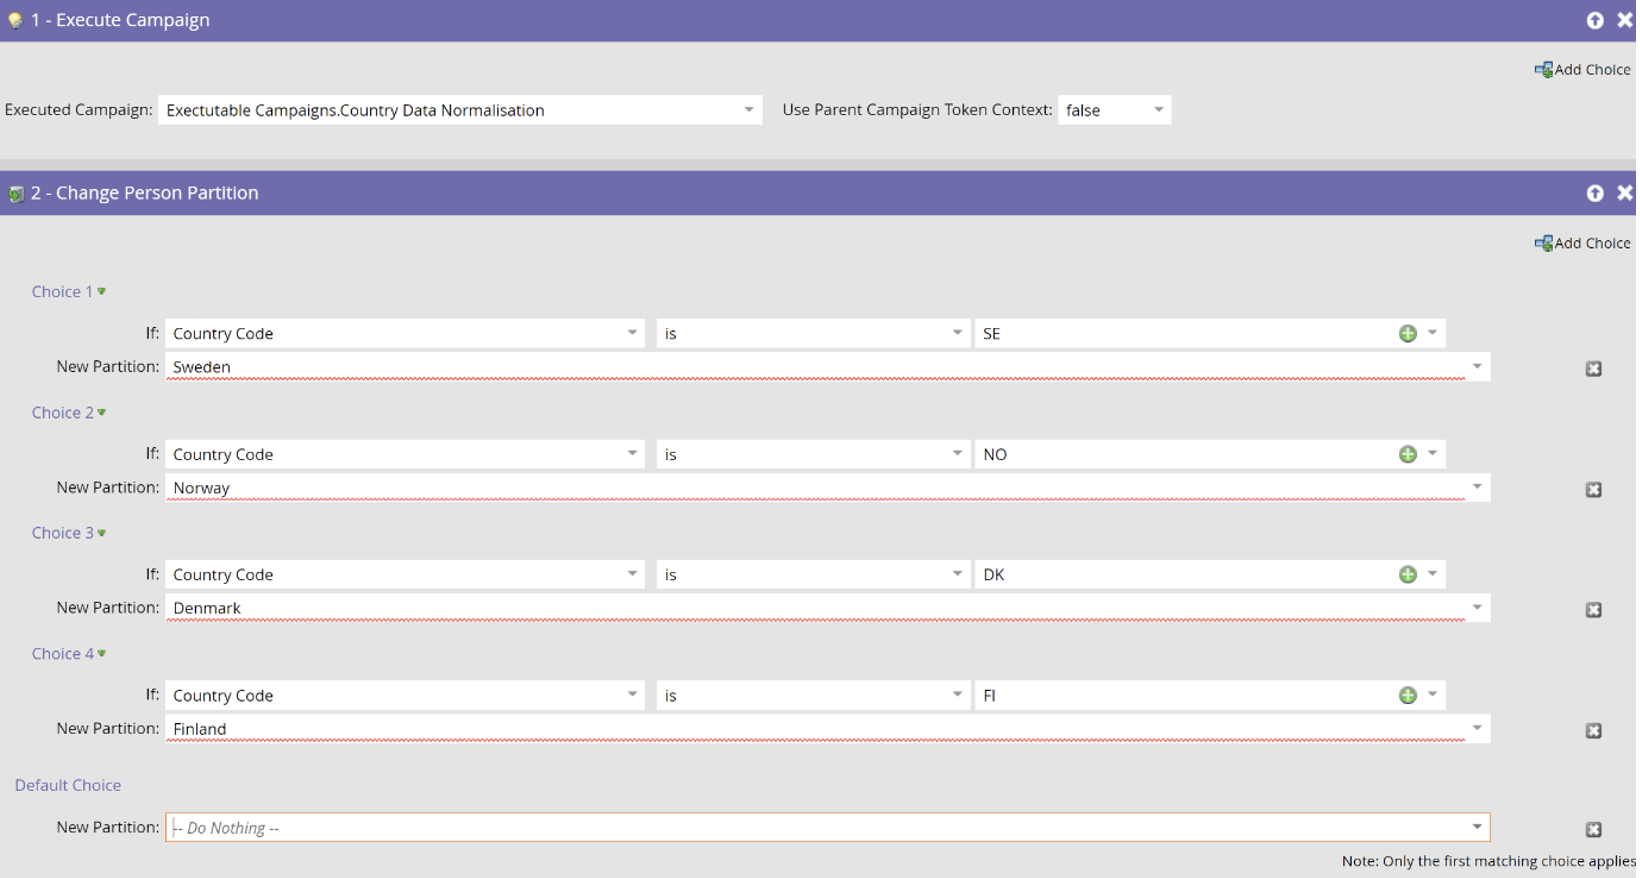
To assign persons to Lead Partitions based on normalized data, you can utilize the Execute Campaign to first normalize data, and then (without any need for a wait step) assign to the correct Lead Partition.
If we get leads with local country name or English country name, an Executable Campaign might look like this:
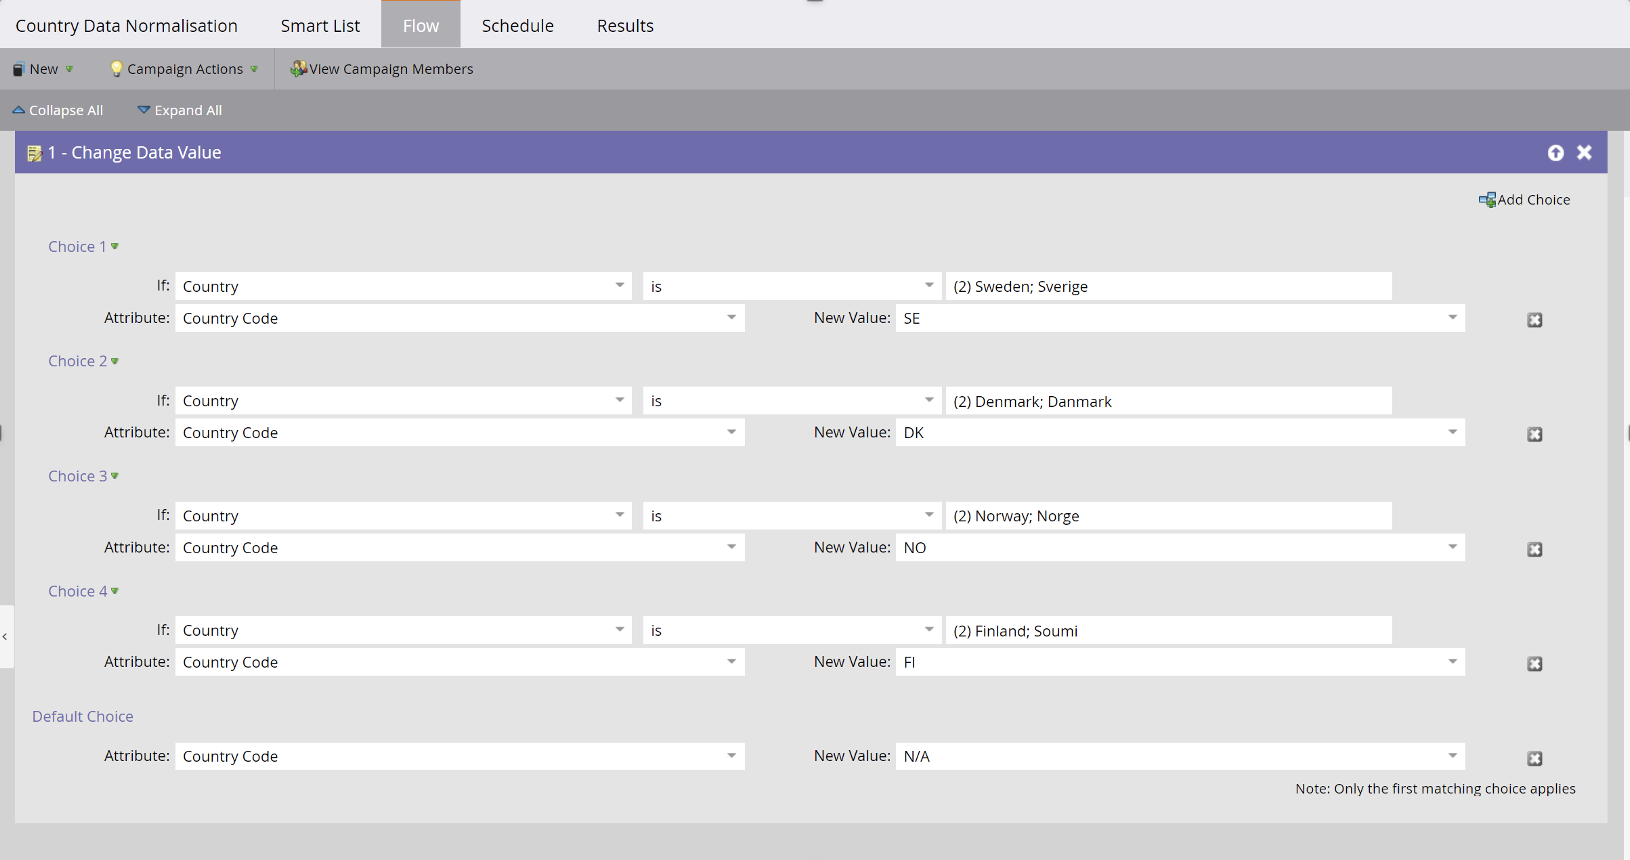
Next, we have a Lead Partition Smart Campaign that executes the Country normalization, which then assigns persons to the correct Lead Partition:
3. Build your entire Lead Management Program based on Executable Campaigns
When it comes to lead creation, make sure all data normalization is done using Executable Campaigns before syncing with your CRM.
For example, set Lead Source and Lead Source description using Executable Campaigns.
When changing lead status from Engaged to MQL, you can use Executable Campaigns before sending internal alerts (without any wait step that ensures you have all the information on the lead before you hand it over to sales).
There are many valuable ways to take advantage of Executable Campaigns. Another recommendation is to set up and leverage local tokens in Interesting Moments – especially if you’re already using {{my.content name}} for content downloads.
* Bonus Tip: Test of Parent True vs. Parent False
For the Form Program, I added a token named “Form Program,” and to the Executable Program hosting the Executable Smart Campaign I added “Operational Program” and tested for verification what occurred with “Parent True” vs. “Parent False.”


If no token is available in the Operational Program, it does not matter if true” or false is chosen, as the system will select the token from the Parent Program regardless.
Below, I have deleted the token in the Operational Program, and kept the token in the Form Program. The first form fill out and trigger is the same as “Parent False” (shown above), and the second form fill out is after the token was deleted from the Operational Program.

Executable Campaigns is a valuable new feature that will enable you to leverage marketing automation more efficiently in Marketo.
Interested in learning more about how your business can optimize your Marketo instance, leverage newly-released features such as Executable Campaigns, and accelerate your lead to revenue opportunities? Just provide us with a few details about yourself to book a meeting with one of our Certified Marketo experts today: